
All buyer guides · · OPINOX
For a compact solar wall light, prepare a complete production-intent assembly, an installation drawing and an agreed test configuration before requesting an IP test. Include the actual lens or window, gasket, battery cover and cable entry wherever the design uses them. The IP code describes the protection provided by the enclosure in the tested configuration.
In this guide
- Start with the mounting position and target
- Review each opening as an assembly interface
- Record any changes after the test
- Draw a boundary around the enclosure being tested
- Inspect corners, screw seats and cable entries before sending samples
- Keep engineering screening separate from the laboratory result
- Agree on sample labels and a repeatable assembly checklist
- Set purchasing milestones around changes to the enclosure
- RFQ questions and answers
Start with the mounting position and target
Show the tester how the light is installed. Label the top face, wall angle, mounting hardware and any holes concealed by the mounting surface. If the design is intended to work in more than one orientation, tell the lab which configurations will be sold so it can advise what to test.
IEC 60529 classifies the protection provided by electrical equipment enclosures. Intertek’s lighting test guide explains that the two IP numerals refer to different kinds of ingress. Ask the product owner or test lab to confirm the target for the intended application and market before releasing the housing drawing.
Review each opening as an assembly interface
Mark where the front window meets the housing, how the battery cover closes and where the cable exits on a split-panel model. For every opening, record the mating parts, fastener or latch arrangement and the approved drawing revision. On a design with a gasket, review whether the intended seating is even around the corners and near fasteners.
If tooling samples show a seam gap or an uneven gasket footprint, record the observation with the part revision and photos. Ask the design and tooling teams to check the joint before adding sealant or changing the assembly method. The test sample should represent the configuration that will be supplied.
- An assembly drawing with the window, cover, fasteners and all sealing parts identified.
- Installation instructions with the intended mounting position and any surface-dependent seal.
- Sample IDs linked to material, housing, cover and gasket revisions.
- Written agreement about which assembly configurations and tests the quote covers.
Record any changes after the test
Keep the test report with the tested bill of materials and assembly instructions. If a later change affects the enclosure, for example a new cover latch or revised cable entry, give the change details to your lab and ask whether the earlier evidence still applies or a retest is needed.
Draw a boundary around the enclosure being tested
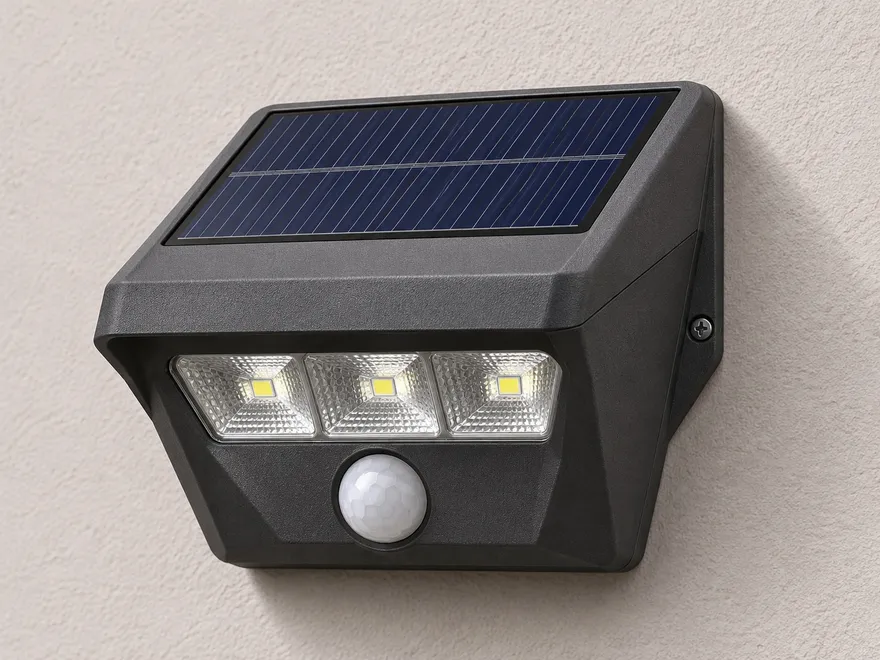
A small solar wall light may look like a single housing on a product drawing. On the bench, it might be a front lens, a deep back shell, a separate solar panel, two mounts and a cover that opens for battery service. On the configuration sheet, draw a line around everything included in the enclosure under review. Mark an external cable as external and show how it crosses that boundary. Include plugs for unused ports if customers will receive them, and show which openings are intentional.
Inspect corners, screw seats and cable entries before sending samples
Work around the assembly in the same direction for every specimen. At the front window, look for uneven seating around corners and where a fastener is close to the lip. At a gasketed cover, compare the witness pattern around the perimeter and confirm which side of the seal is meant to seat against the molded groove. At the cable entry, check the actual wire and fitting against the opening and note how the wire is restrained in the intended mounting position.
In an illustrative review, the lower corner of a battery cover appears open after assembly. Contact photos reveal that the cover is resting on a wire rather than the gasket. The action is to correct routing and inspect a second assembly built from the same revision. A useful report records those two observations and the corrected build. Applying sealant to the first assembly would make the specimen unrepresentative if that step is absent from the production instructions.
- Photograph the perimeter before and after fastening the front window.
- Record screw, washer and gasket identifiers together with the closing sequence.
- Mark areas where the wall bracket, wire or battery presses against an enclosure joint.
Keep engineering screening separate from the laboratory result
Set a purpose before each sample exercise. A trial enclosure can answer whether the cover sits flat, whether the screws reach the intended seats and whether the gasket can be assembled without twisting. A simple workshop comparison may help find a suspect joint. Agree with the lab how to document any exposure it uses for a formal claim. The lab can also explain how it will assess the assembly after the test and which parts must be accessible for examination.
Record whether the sample came from the intended plastic mould and whether there are manually machined areas, an alternate window or a borrowed gasket. A temporary feature can be perfectly suitable when the purpose is to check access or fit. If the same sample is proposed for formal assessment, hand the lab the differences and ask whether the specimen can support the intended claim. Keep laboratory evidence tied to the mounted configuration and the stated scope.
Agree on sample labels and a repeatable assembly checklist
Put a sample number on a removable tag or the packing label so the marking method does not disturb a seal or change the enclosure. List the product revision, the part revisions, the test purpose and the build date against that number. For molded parts, ask the supplier to record the material grade and identify an individual cavity when that information is available. Save a photo showing the relevant mounting orientation and the state of covers, plugs and cable connections.
Request an assembly traveler with the steps needed to reproduce the test sample. For example, it could start with seating the gasket and route the wire before the battery cover is tightened. If the engineering team has set a tightening requirement, reference its drawing or instruction rather than relying on a technician’s memory. When the laboratory receives another specimen of the same variant, these records make it possible to compare the configurations directly.
Set purchasing milestones around changes to the enclosure
You can start a request for quotation with an unfinished seal design if the open decisions are easy to see. Separate the price for the plastic parts from assembly labor, prototype parts and third-party testing, and state which materials and revision assumptions each supplier priced. Ask for a drawing review before cutting steel on any dimensions that govern window retention, gasket seating or battery cover closure. An RFQ becomes easier to compare when quotes refer to the same specimen and deliverables.
After a tooling revision, review which questions the earlier sample batch answered. A gate relocation discussed for appearance deserves a check on the affected part, while a change to a screw seat, seal profile or cable entry also needs reviewing against prior ingress evidence. Make the disposition explicit: reuse evidence with written confirmation, order a focused new check, or send a new specimen after discussing the scope with the lab. Allocate responsibility for updating both the drawing and the instructions used to assemble the sample.
Buyer questions
Can the molded shell alone establish an IP rating for the finished lamp?
Ask the lab to define the test specimen. The lens, cover, seals and other openings affect how the installed enclosure performs, so a bare shell does not establish the rating of the assembled light.
Should the test sample include a removable battery cover?
Include it if it forms part of the enclosure. Show how it is closed and secured and agree on the test configuration with the lab.
RFQ questions and answers
What drawing package should I send for an enclosure quotation?
Send an assembled 3D model, a section through each sealing interface, the installation orientation and a bill of materials with revision identifiers. Mark the parts you are sourcing, for example the molded shell and cover. Include supplier drawings for any gasket or cable fitting you already selected so bidders can review the same interfaces.
How should I describe variants that share a housing?
Make a small matrix with one row for each commercial variant. Identify its lens, battery cover, entry fitting, bracket and permitted mounting orientation. Ask the suppliers to flag which parts and tooling are shared. Let the lab determine which combinations can be assessed together and what evidence it needs for any variant it treats separately.
Can the quotation start while the battery cover is still being revised?
Identify the latest released geometry and mark exactly what might change: cover perimeter, entry notch, screws or gasket. Ask the bidder to list tooling assumptions and the point at which the joint must be confirmed. Request a clear pricing basis for a revised cover so you can compare bids without assuming all changes are included.
Who supplies the assembled specimens for independent testing?
Name the party responsible for final assembly and who provides the lens, gasket, battery cover, hardware and mounting instructions. List what extra parts the lab should receive if it needs to open the specimen. Ask what records and follow-up samples the quotation includes, and who will resolve a mismatch between the report and the build sheet.
What should come back with the sample batch?
Ask for specimen IDs, a photo of the assembled light, the part and material revisions and a short record of how the sample was closed and mounted. Request an assembly checkpoint for any open design question. If a sample includes a hand modification, ask the supplier to identify it so you can use the result within the correct scope.
Related products and services
Discuss this project with OPINOX →